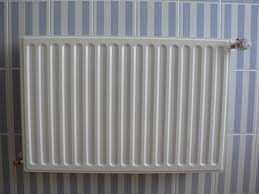
Knowing how to balance the radiator circuit of a gas central heating system is a handy trick that can make the difference between a miserable winter and a harmonious one, in case you do not only use electric models. By balancing the radiators you can distribute heat evenly around the house and no-one will be complaining that their radiator is hotter or colder than anyone else’s.
Before Balancing Radiators
Balancing radiators isn’t particularly difficult in itself and doesn’t require a great deal of plumbing knowledge or a gas engineer. But you do need to know the technique and have the time to go through the process methodically.
It can be tedious and time-consuming to balance a heating system so don’t embark on it unless you really need to. The signs that your radiator circuit will need balancing will be different radiator temperatures at different points of the house. Typically the radiators furthest from the boiler or the pump will be significantly colder than the others.
Check Heating Systems Carefully
 It’s important to make sure that you don’t have another problem that can cloud the issue before you start balancing. Bleed all the radiators, not just the ones that are cold, and check that there aren’t any cold spots on the radiators themselves. For example, if all the radiators at the top of the house are hot and those on the ground floor cold then there is likely to be a fault with the pump. There’s no point balancing the system and then having the pump replaced as it will have to be done again.
You also need to know the order of the radiators in the circuit. You can do this by tracing the pipework for the heating system or, if your pipework is largely hidden, doing a test run. Make sure the heating has been off for two or three hours to allow all the radiators to go completely cool. Then turn the system on and note the order in which the radiators warm up. You can then go straight into the balancing process.
Getting Ready for Balancing
Armed with the route map for the radiator circuit, get a spanner for the radiator valves, a screwdriver and a pen and paper. It also helps if you have a couple of clip-on pipe thermometers, but this will set you back at least thirty pounds and perhaps more. You might be able to hire some, or if not buy a pair then sell them on again afterwards, as it’s not a job that you don’t have to do very often.Open all the main radiator valves fully (or put the thermostats on their highest setting, if you have thermostats on the main valves). Then fully open the lockshield valves; these are the smaller valves at the opposite end of the radiator from the main valve.
Balancing Each Radiator
Going back to the first radiator in the circuit, clip a thermometer to each of the pipes. Screw the lockshield valve down fully then open it slowly until the temperature of the inlet (hot) pipe is eleven degrees Centigrade higher than that of the return (cold) pipe.Go around the house repeating this process on each radiator, working along the circuit away from the boiler. You’ll probably find that the last radiator will need its lockshield valve fully open. Once this has been done all the radiators should be the same temperature throughout the house.


