Having the correct Wallpaper Tools at hand makes preparing and hanging wallpaper a much easier DIY project. Although not all of the tools mentioned here will be needed for every wallpapering project some, such as a clean bucket and the correct brushes, are essential.
Bucket – A clean plastic bucket, used for holding the wallpaper paste. Tie string across the top, between the handle brackets, so you can rest your pasting brush on it. It is better to buy a new bucket to use for wallpaper paste only, rather than reusing a bucket which might have dust and dirt in it.
Craft Knife – A sharp craft knife is better for cutting heavy paper or vinyl than scissors. Using scissors on heavy paper will increase the chance of you ripping or tearing the paper, particularly pasted paper. Remember to use with a metal straight edge.
Metal Rule – Make sure this is at least long enough to span the width of the paper. Don’t be tempted to use a piece of wood, etc. You can buy long metal straight edges for less than £10.
Pasting Brush – Most paste brushes have synthetic bristles and plastic handles to avoid rusting. The pasting brush you choose should be at least 100mm wide and used only for pasting. Many pasting brushes now feature a hook for hanging it on the side of a bucket.
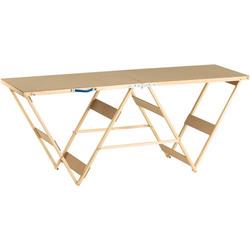
 Pasting Table – If you plan on doing a lot of wallpapering, a purpose-built pasting table is a great investment. You can buy a good pasting table for as little as £25, with cheap ones costing under £10.
Pencil – Use a HB or soft lead pencil, which will mark the paper clearly without needing too much pressure applied.
Plumb Line – A plumb line is an essential tool when starting any papering job. It allows you to find true verticals and is used to set the first sheet of wallpaper. You can also use a Laser Level if you have one.
Rags – Clean, lint-free rags are useful for cleaning your pasting table.
Sanding Pad – Useful to have close at hand to remove any scraps of paper left on a stripped wall.
Scissors – A small set of trimming scissors and a large set for cutting your paper ready to hang. Trimming scissors are used to cut around obstructions such as light fittings and window sills.
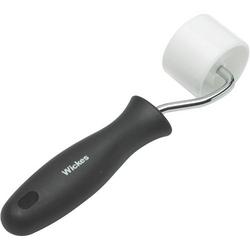
 Seam Roller – This small plastic or wood roller is designed specifically for finishing seams in wallpaper. Seam rollers are also useful for other DIY jobs such as fitting flashing, so having one in your toolbox is a good idea.
Set Square – Not essential but useful for checking your cuts are consistently square.
Smoothing Brush – Sometimes known as a paperhangers brush, a smoothing brush has stiff but soft bristles so it does not mark the paper as you brush out air bubbles. Make sure your smoothing brush is kept clean and dry of you will end up smearing paste over the face of the paper.
Sponge – For wiping away excess paste whilst it is still wet.
Tape Measure – For measuring the height of the room, as well as measuring the overall wall space.
Steps – Good quality, aluminium steps are ideal as they are light, easy to move and sturdy. If you have two sets of steps, you can set up a small platform by placing two planks on level rungs. This can make wallpapering much easier.
Water Trough – Only needed if you are using pre-pasted paper. The paper will need to be soaked in the trough before applying it to the wall.


