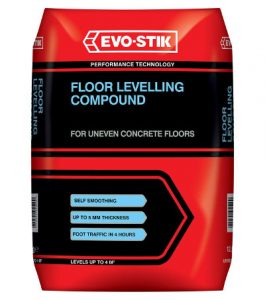
Floor levelling, or levelling a concrete floor, using a flooring compound is a quicker and easier way to create a usable floor surface than laying a whole new floor. When laying any type of floor compound onto a solid floor, it is important that the subfloor is sound, level and flat.
By ensuring that the subfloor is in the best possible condition, you will create a far better finish and help to keep the flooring in better overall condition. There are several possible different types of subfloor to consider, and choosing the correct type of floor levelling compound is important.
This guide will highlight some of the possible problems you may encounter when levelling a floor, as well as showing you the best way to apply your chosen levelling compound.
Types of Subfloor
Different types of subfloor will need to be treated in different ways in preparation for the levelling compound.
Absorbent Subfloors – Absorbent subfloors would include sand and cement screeds, concrete and calcium sulphate screeds. If your subfloor is absorbent you should consider priming it with a diluted acrylic primer before you apply the levelling compound.
Non-absorbent Subfloors – Non-absorbent subfloors are those which would not let moisture pass through them. These would include surfaces like ceramic and quarry tiles, terrazzo, asphalt and power floated concrete. If your subfloor is non-absorbent you should prime it with a high-performance acrylic primer.
Painted Subfloors – You may find that the subfloor has been painted with a oil-based emulsion or epoxy solution. Epoxy and polyurethane paints can be left in place if they are in good condition, but oil and acrylic-based emulsions should be completely removed before laying the levelling compound. It will normally be difficult to work out which type of paint has been used, so it is usually best to remove any paint before continuing.
Levelling a Concrete Floor
Hopefully you have now identified the type of subfloor you are working with, and know what you will need to do to prepare and level a concrete floor.
Preparing the Subfloor
Before you lay the levelling compound, you need to make sure that the subfloor is clean and free from dirt and debris. Sweep up any large pieces of material and then hoover up any remaining dust. Dust and dirt may effect the adhesion of the compound, so this is an important step to take.
You should also make sure that any cracks and holes in the subfloor are repaired and filled before continuing. Use good quality repair mortar and ensure that you leave it to set for the recommended period.
If the subfloor is newly laid concrete or screed, it must be allowed to dry completely before adding the levelling compound.
Applying the Floor Levelling Compound
There are two main types of floor levelling compound: water-based and latex-based. Each type is recommended for different applications, so be sure to check which is best for your situation before you buy.
You will need: A large mixing bucket (at least 30 litre capacity) such as a Rhino Tub, a measuring bucket (7 litres), an electric drill with power whisk attachment, and a flooring trowel and float. You should also use gloves, mask and eye protection, as well as knee pads.
 Following the manufacturers instructions, add the required amount of clean, cold water (or latex solution) to the mixing bucket. Gradually add in the prescribed amount of compound powder, using the power whisk to mix it all the time.
You are aiming for a smooth, lump-free consistency, so keep mixing for at least 3 minutes or until you achieve that. You are aiming to mix enough compound to cover the whole floor to the desired depth (at least 3mm) in one go.
Start to pour the compound in roughly the middle of the area to be covered. The compound should be allowed to spread and flow out to the edges, finding its own level. Your should have little need of the trowel or float to smooth the surface, but you may need to tidy up the edges.
To really ensure a smooth, bubble-free finish, it is a good idea to run an aeration roller across the wet compound. This will ensure that not only surface bubbles, but also hidden bubbles are removed.
Drying times for the floor levelling compound will vary depending on different conditions. These include the absorbency of the subfloor, the temperature of the room and the relative humidity. Most types of levelling compound, laid to a thickness of 3-5mm, will be able to accept foot traffic in 24-36 hours.
Any imperfections, lumps or bubbles can then be smoothed out with a carborundum stone, which are available from DIY stores.


