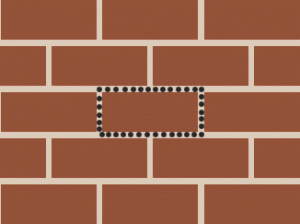
Bricks are a hard-wearing and long-lasting building material that, with a bit of regular maintenance, should remain problem-free for many years. A very hard knock may, however, crack a single brick in the middle of a wall. Even if the brick does not split from the impact, the crack may allow water to seep in.
Water can cause problems if it is allowed to seep under the outside face of a brick. In cold weather, the water can freeze and, as it expands, the face of the brick can crumble away in a process called Spalling. Once this happens the wall is no longer waterproof as moisture can easily penetrate through the exposed inner surface.
If you live in an old brick-built house, it is likely that at some point some of the bricks will need repairing or replacing. Being able to remove a single damaged brick without damaging the surrounding bricks, and then securely replace it with a new one, is a useful DIY maintenance skill to have.
Step 1 – Removing the Broken Brick
Using a club hammer and cold chisel, carefully remove the mortar surrounding the damaged brick. To speed things up you can drill a series of small holes into the mortar all the way around the brick, to a depth of about 100mm. This will make it easier to chisel away the mortar and remove the brick. Chop out as much mortar as possible from the opening.

Use an old brush to clear out the hole and then dampen the inside well. Dampening the surrounding bricks helps to ensure that the water is not drawn out of the new mortar when it is applied. If too much water is absorbed from the mortar, it may be weakened and crumble when it fully sets
Step 2 – Inserting the New Brick
Dampen the replacement brick slightly and then apply a 15mm thick layer of mortar to the bottom and one side of the opening using a bricklayers trowel. When replacing a single brick it is best to put mortar on the bottom and one side of the hole, and then add mortar to the top and opposite side of the brick before you slot it into the gap.
Slowly press the brick into the hole until it is flush with the surrounding bricks. Use the end of the trowel handle if you need to gently tap it in the final few millimetres. If there are any areas where the mortar does not fill the joint around the brick, use the tip of the trowel to press extra mortar in to fill them.
Step 3 – Pointing Around the New Brick
When you are sure that the joints are full of mortar, use the trowel to point the vertical joints first and then the horizontal joints. The mortar should form a continuous band and, in the horizontal joints, be sloped out towards the bottom slightly to allow moisture to run off.

The vertical joints should be sloped to one side. Finally, clean up any excess mortar and carefully brush down the wall to remove any stains. Stubborn mortar stains can be disguised by rubbing them with an old piece of brick.
Common Mortar Pointing Styles
There are three types of horizontal pointed joints: Flush, Keyed, and Weatherstruck, the style described above.
- Flush joints are created by over-filling the joints, allowing the mortar to harden slightly, and then rubbing it down until it is flush with the surface of the brick.
- Keyed joints can be achieved by pressing a piece of hose pipe, or similar-sized tube, along the joints whilst the mortar is still wet. This creates a smooth, concave joint.
- Weatherstruck Joints, as described above, are sloped outward at the bottom to allow rainwater to more easily drain off. The joint should look like the brick above is overhanging.


