If you have had a problem with damp that has left unsightly stains on the walls or ceilings of your home, covering them up after the problem has been solved can be tricky.
Residual moisture in the wall or ceiling can take a long time to dry out, so stains can tend to reappear if covered with normal paint. This means you will need to approach the problem in a different way than if you were just trying to paint over a normal mark on the wall.
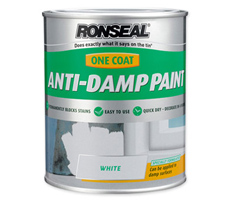
Using a product such as Ronseal Anti-Damp Paint is one way to solve this problem.
Step 1 – Prepare the wall
Assuming the cause of the damp has been solved, clean the stained area as well as you can and ensure that it is free from loose dirt and dust. Repair any holes or cracks and make sure that the surface is as smooth as possible by sanding with abrasive paper. Ronseal Anti-Damp Paint can be applied onto damp walls, but not walls that are still saturated with water.
Step 2 – Apply the paint
 Mix the paint well and don’t be tempted to thin it down. The paint will seem a lot thicker than normal emulsion, but this is how it should be.
Apply the anti-damp paint using a brush, in a coat that is even and generous. Extend the painted area at least 30cm past the edge of the damp stain, feathering it in to the surrounding unaffected paint or plaster.
Step 3 – Leave to dry
You should leave the anti-damp paint to dry for at least 4 hours (longer if possible), but once this time has passed, you can paint or wallpaper over the painted patch without worry.


