Lining a floor with hardboard is one of the easiest way to level an uneven floor. If you are planning to lay vinyl sheet, tiles or even laminate, and your subfloor is old floorboards, it is more than likely that the floor will need to be levelled. The easiest way to do this is to cover the boards with a thin layer (3mm – 12mm) of hardboard, giving yourself a smooth, flat surface to work on.
Tiles, ideally, should be laid directly on to concrete, but if you wish to lay them over floorboards, use 12mm hardboard or plywood and fix it down firmly with screws every 300mm or so. It is not a good idea to lay ceramic or stone tiles on suspended upper floors unless you are sure that the joists can carry the extra weight (consult a structural engineer for this). If you are planning to tile over the hardboard, make sure that the rough “mesh” side is facing up to give more of a key for the tile adhesive.
Lining the Floor
Covering a floor with hardwood can cause a few problems if you do not plan ahead. Once the floor is sealed, you will obviously have less access to any pipes or electrical wiring running underneath the floor. Marking the runs of any pipes or wires onto the hardwood (if you know where they run) can save time at a later date. You also need to make sure that there is adequate ventilation beneath the floor. Once it is sealed with hardboard you could have trouble with dry rot and damp. Make sure any airbricks at underfloor level are clear of debris.
Measure your room and work out how many sheets of hardboard you will need. When you get the boards home, store them in the room you will be laying them in. 48 hours before you lay the boards, sprinkle the rough face of them with a little water, then stand them on their edges, back to back (rough face to rough face).
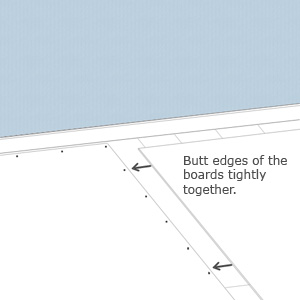
 When laying the boards, start in the middle of the room and work outwards. This is so that only the boards around the edges of the room will need to be cut. Lay the boards in an offset pattern so that the joints do not line up. This will help to make the floor nice and firm and stop you having one weak “fault line”. Nail the boards down using 20mm hardboard pins, making sure you nail all the way around the edge of each board and also down the middle of each board. Gaps between pins should be no more than about 300mm. Cutting a scrap of wood to 250mm-300mm to use as a guide makes things easier here. Simply line the bit of wood up with the last nail and you instantly have the distance to the next nail position.
When you reach the edges of the room, scribe the boards to fit the gaps and cut them with a fine-toothed Jig Saw or Tenon Saw. A slight gap around the edge of the room (10mm or less) will allow for any expansion over time.


