The best way of repairing chipped ceramic tiles is to use a repair kit. Small chips or cracks in ceramic tiles and bathroom fittings are a common DIY problem. Dropping a heavy object onto tiles, the corner of a sink or a ceramic shower tray can sometimes break off small pieces of the material, leaving an unsightly mark.
Thanks to the availability of ceramic repair kits, this is no longer such a problem, and certainly not one which would require the messy and potentially expensive step of removing and replacing the whole fitting.
The exact instructions for using a ceramic repair kit may vary slightly, but all work in basically the same way.
Repairing Chipped Ceramic Tiles
Here are some guidelines to follow that will help you to avoid some of the common mistakes made when using ceramic repair kits.
Step 1 – Preparing the Chipped Tile
Use a small dry paintbrush to remove any dust and dirt from the chipped area. Make sure the whole area, both in and around the hole, is completely dry. If the area is wet, the repair filler might not adhere properly and could simply fall out at a later date.
Step 2 – Mixing the Ceramic Filler
Follow the manufacturers instructions for mixing the ceramic filler. Some kits will contain powder filler, whilst others will include pre-mixed filler. Mix a small amount, but ensure that you have enough to fill the chip or crack in one go.
Step 3 – Apply the Filler
Use a small pallet/filling knife to apply the filler to the chip or crack. The filler will shrink as it dries so make sure that you fill slightly proud of the surface. This can always be sanded down later if required. Make sure the filler is pressed firmly into the chipped area and has completely filled it.
Step 4 – Sanding the Filler
Wait for the filler to dry completely (follow the time guidelines on the manufacturers instructions) and then sand the area until it is smooth and matches the rest of the surface as closely as possible. Use fine-grade sandpaper and take your time to make is smooth.
Step 5 – Finishing the Tile Repair
To make the repair waterproof, it will need to be painted over with the paint supplied in the kit. Use a small, clean paintbrush to do this as it will help to achieve a smoother finish. Try not to paint beyond the repaired area too much.
Any excess paint on the surrounding ceramic can be carefully removed with Acetone. If you have taken your time and worked carefully, the repair should be almost invisible.
How to Paint Tiles – DIY Advice on Painting Tiles in Your Home
DIY Extra Recommends…
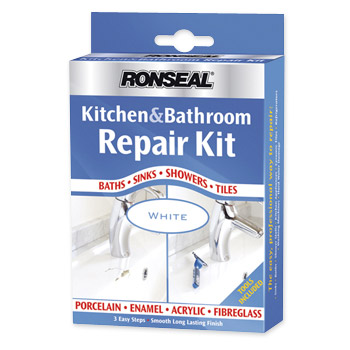
 Ronseal Kitchen and Bathroom Repair Kit
For small chips and cracks, Ronseal’s Kitchen and Bathroom repair kit is hard to beat. Applied with a brush and giving a smooth and solid finish, it is perfect for breathing new life into an old kitchen or bathroom fitting.
The kit enables you to instantly repair kitchen and bathroom fixtures and appliances. Use it to repair sinks, washing machines, baths, ceramic tiles, refrigerators, shower stalls, and hard water damage. It’s designed to be used on enamelled cast iron, steel, porcelain, fibreglass, acrylic and other similar materials.


